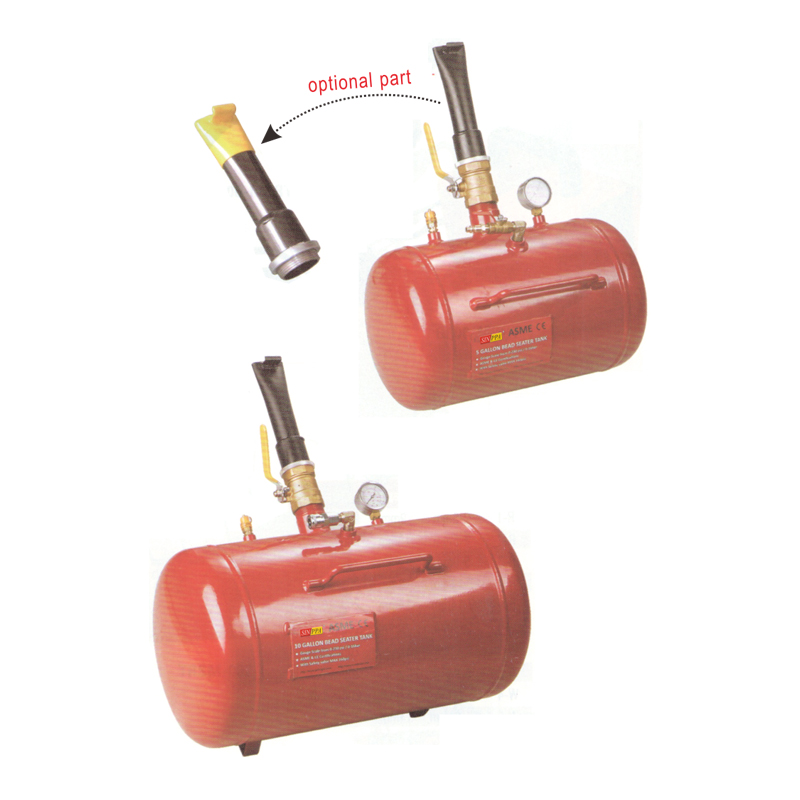
The Bead Seater is most often used when a tire, either new or old, is placed on a flat or off road wheel and the bead doesn't touch both sides of the rim, which makes inflation difficult. The air pump on this handy tool expels a huge blast of air which fills the tire to almost seat it to the rim, regardless of how deep it can go. This device helps keep a tire properly inflated to ensure that it always works properly.
In order to use this amazing tool, you will need an air compressor, air hose, tire valve, and a 5 gallon bucket or tank. You will also need a bulb and valve clip so that the air pressure in your tire can be monitored. It's important that you change the air valve every time you change your air pressure so you won't get an overload. Using the tool is really easy. Start by filling the bucket or tank up with a mixture of water and propane.
The next step is to lower the lever located on the air compressor until the valve is fully open. Then you just keep pumping the lever up and down. Keep on pumping until you hear a gurgling sound. If you have a bead seater, then this noise means that the valve is fully seated in the reservoir. You may need to do this several times for a complete set of tires.
When you are done with your cycle, take the air hose and fill up the bucket with clean water. You should now have enough water in the tank to fully fill the Bead Seater. You can determine the correct setting for your Bead Seater by observing how the gauge reads. If you see two levels at the gauge, then you know you have two beads. You may also see a single level at the gauge and a zero level indicating air only.
Now you can use your new Bead Seater to check and ensure proper air pressure in your tires. You will need to measure the height of your tires from the ground to the valve and you should use a spirit level to confirm the reading. If you find that the reading on the Bead Seater is accurate, then you are ready to set the Bead Seater to the correct setting. The recommended settings for a 5 gallon bucket are a total PSI of 48, and a discharge valve that have no release mechanism.
If you don't have a bucket or tank and you want to test the Bead Seater without having to get a container of water, you can place it upside down with the valve facing up. Pour the bucket of water into the tubing attached to the side of the Seater. Turn the valve on and after fifteen seconds, see if the water drains into the bucket. When you pour the other 5 gallons of water into the tubing and turn the valve off, you should see that the water drains into the container of water.
Another thing you will want to check when you are using your Bead Seater to test the air pressure in your tires is if the indicator needle is always up. This means that the tire bead seater is not drawing air into the system. If the needle always comes out with the air needle pointing, then you are getting the air into the system. Next, you will want to test the resistance of the gauge. It is easier to visually check the resistance versus the PSI and then compare this with the measured pressure in the tank of water. If you find that the pressure is consistently higher than the measured value, then you are probably going to need to change the settings on your tractor tire bead seater.
If you do need to replace your tire bead seater, it is a good idea to keep your new one in a spot where it can be reached easily. You do not want to have to move it while someone is trying to change it. In addition, it is better to keep your tire bead seater indoors or in a place where there are no exposed wires or screws. If the current is dry, there is no reason to water down the tubing so it should stay in good shape for quite some time. To maintain your Bead Seater, make sure to drain the water and change the air filter at least twice a year.


 China Pneumatic Tools Manufacturers